
How to Set Up a Fixed-Term Subscription
Some plans should run for a set number of months and then stop on their own — for example, a 10-month tuition plan or a 12-month payment plan. This guide walks through setting both the start date and the end date so billing begins and ends exactly when you want, with no surprise partial charges.
Example scenarios:
- 10-month plan: bill on the 1st, August through May → 10 charges, then stop.
- 12-month plan: bill on the 1st, August through July → 12 charges, then stop.
Step 1 — Create the recurring product/service
Set up your recurring product or service first. See Adding Recurring Tuition Products to Your App.
Step 2 — Go to Billing
In your Administrative Superpowers ⚡️, open Billing — payments, invoices, subscriptions.
Step 3 — Select the child's profile
Choose the child you want to invoice.
Setting up the same plan for several children?
Step 4 — Create the invoice
In Create Invoice, click Add Item and choose your recurring product/service.
Step 5 — Set the collection method
Under Collection Method, select Charge Automatically (recommended).
If you use Send Invoice instead, families pay manually, and you'll set the invoice payment due to the number of days they have to pay each cycle. To land the due date on a specific day (like the 1st), set the Start Date a few days earlier — see How to Set Up Monthly Subscriptions Due on the 1st of the Month.
Step 6 — Set the Billing Start Date
Scroll to Subscription Settings.
Under Start Date, choose Immediate or Specific Date.
For a plan that bills on the 1st, tap Specific Date and pick your first charge date (e.g., Aug 1, 2026). Billing begins on this date and repeats on the same day of each period.
Step 7 — Set the End Date so it stops on time
Under End Date, tap End on Date to open the Set End Date window.
Each date shows the number of invoices the plan will generate — the end date itself is not billed, and dates align with your billing cycle, so the final invoice is never prorated.
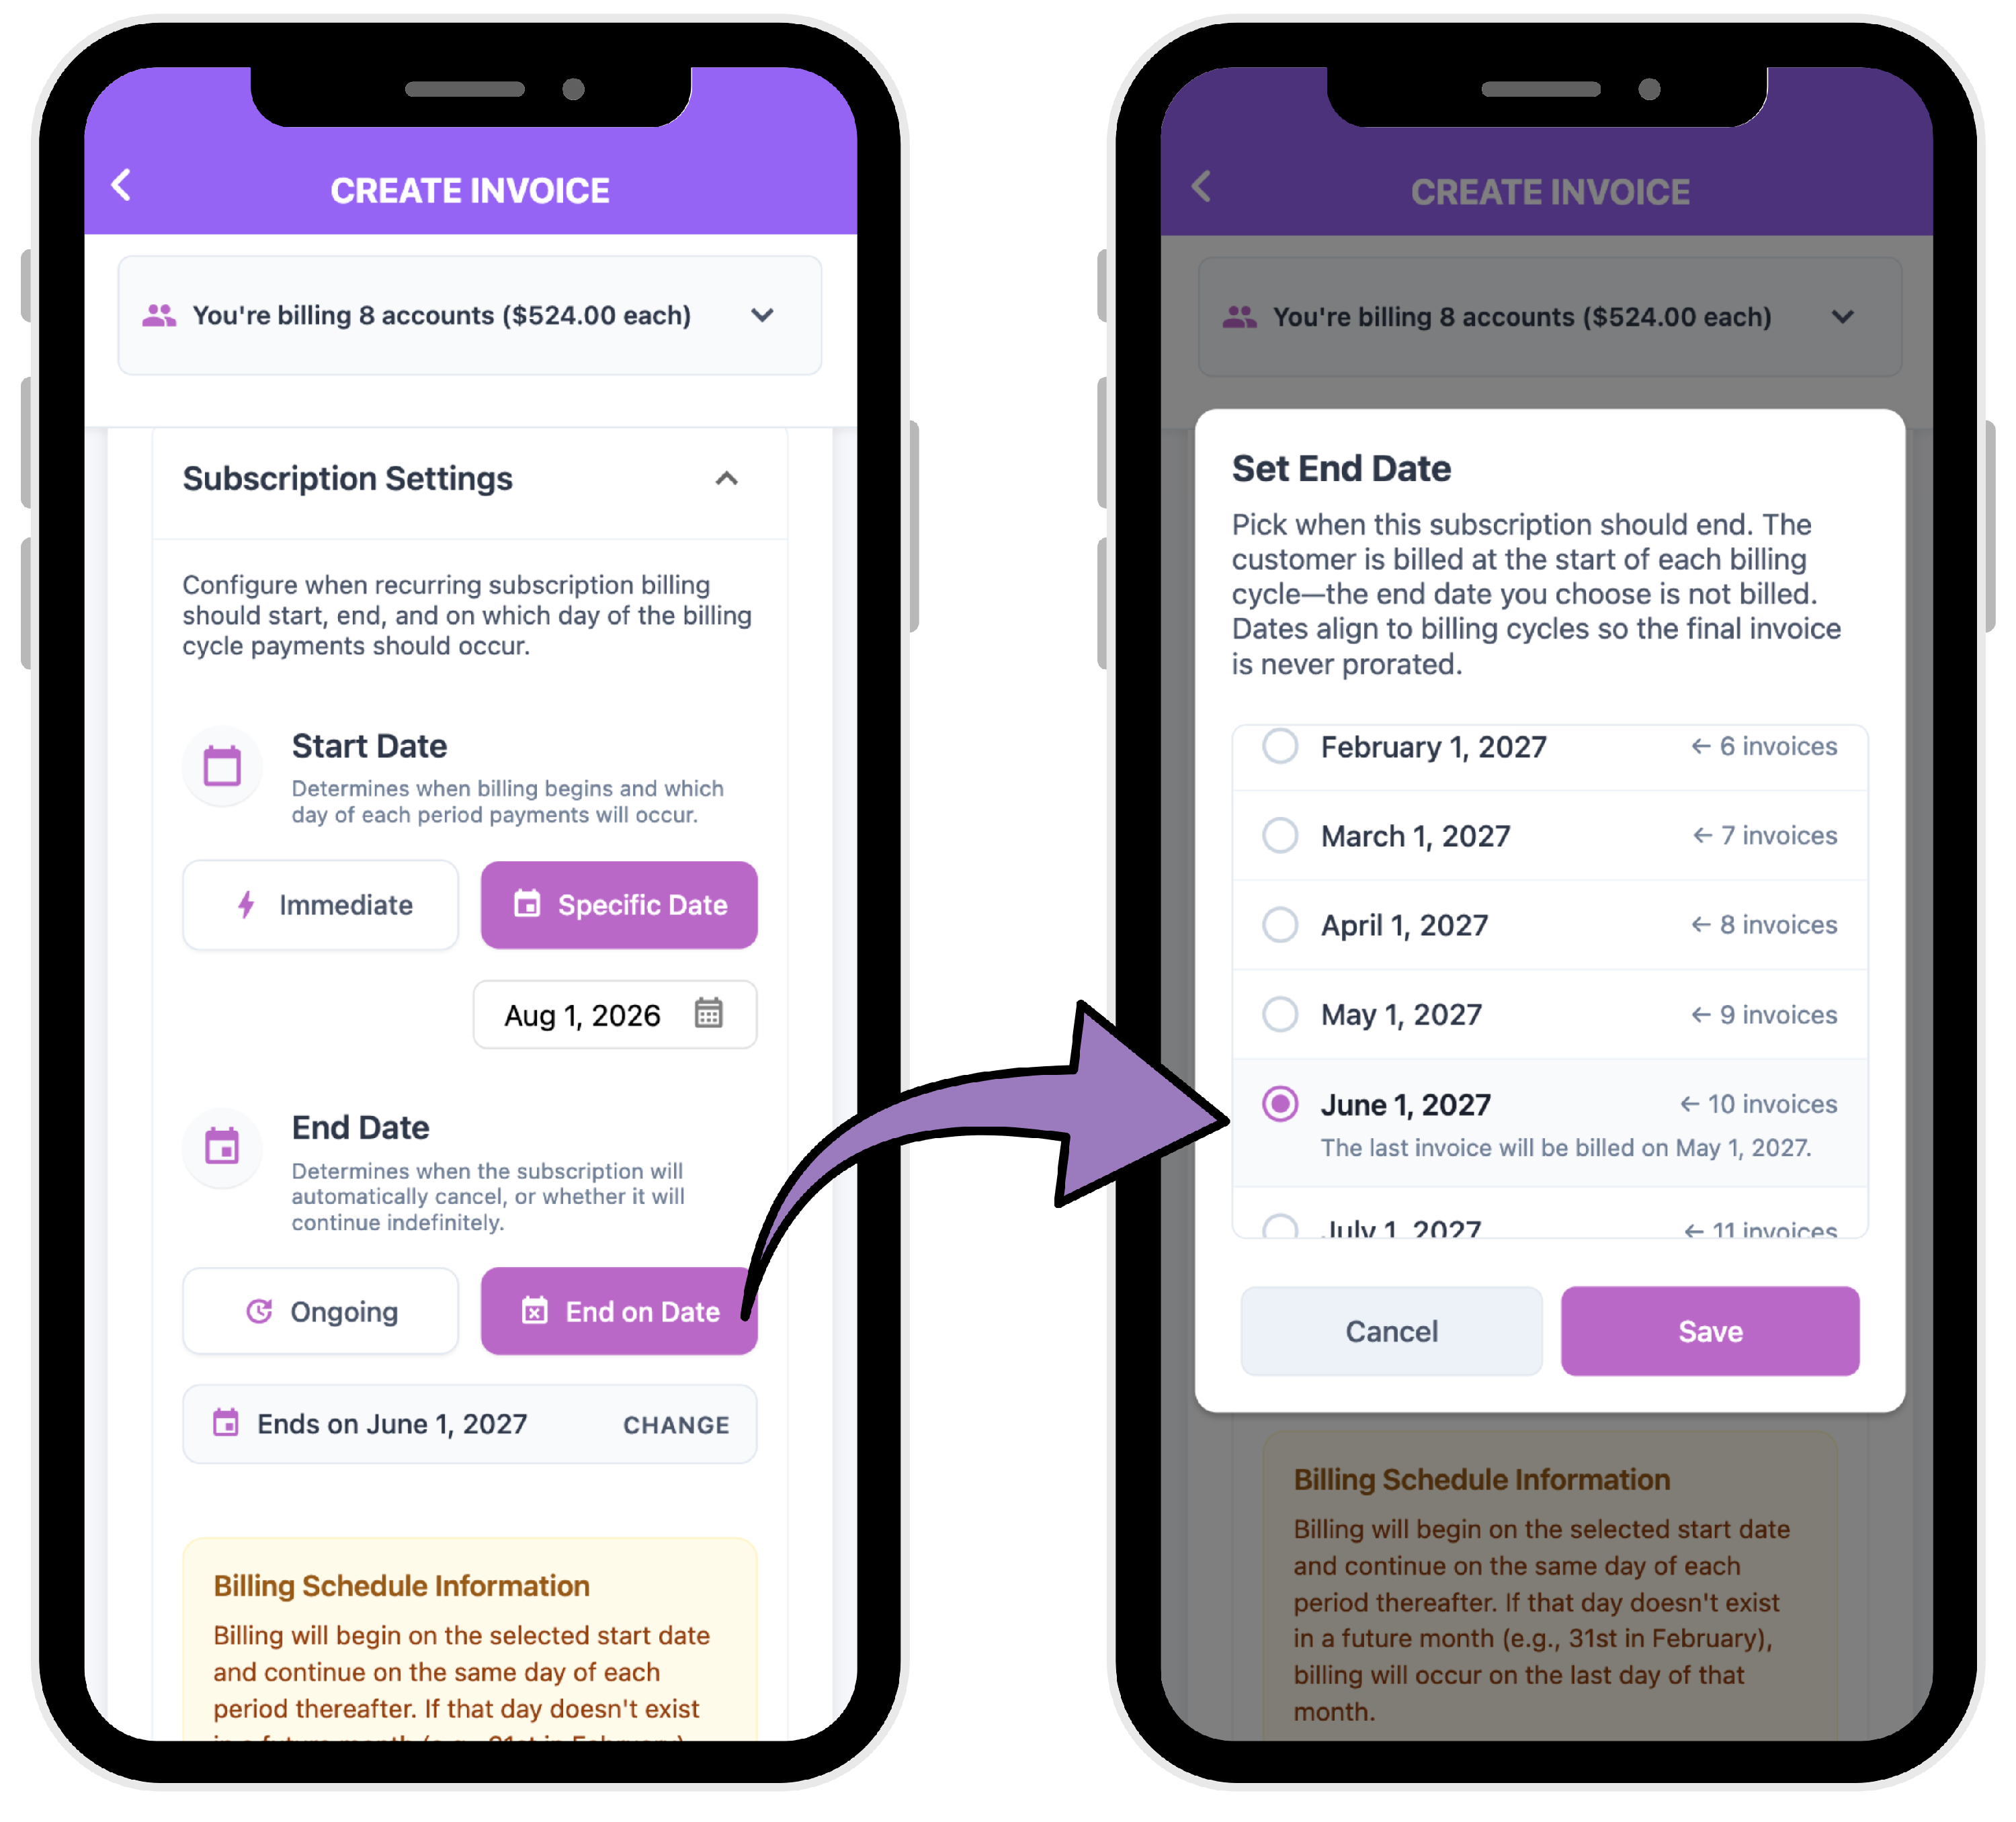
The End Date field now shows Ends on [date] — tap Change anytime before billing to adjust. If you leave it as Ongoing instead, the subscription bills indefinitely
💡 If your billing day doesn't exist in a given month (e.g., the 31st in February), that cycle bills on the last day of the month instead.
Step 8 — Bill Someone to activate
Click Bill Someone to activate the subscription.
Result: billing starts on your chosen date, runs for the exact number of cycles, and stops automatically — no manual cancel needed.