How to Manage All Family Chats from One Screen
This guide shows school admins how to create a Family Chat Screen that organizes all parent–teacher conversations in one place. It explains how to set up private family chat rooms, add them to a single screen for easier management, and ensure parents only see their own chats. This setup helps schools keep communication structured and easy to manage.
✅ Benefits of Creating a Family Chat Screen
🗂️ Organized communication – All family chats are grouped in one screen, making them easier to find and manage.
🔒 Privacy for families – Each family only sees their own chat, while admins and teachers can access all.
⏱️ Time-saving for admins – Instead of juggling multiple screens, everything is managed from one place.
👨👩👧 Better parent engagement – Parents have a dedicated space for communication with teachers.
👣 Step-by-Step Guide
- Create a Family Chat
- Click the ⚡ Lightning Bolt
- Choose New Screen → Group Chat.
- Set your preferred icon and background color.
- Click Manage Members to add members (parents + teacher + admin if needed).
- Under Access, select: Only users in this chat have access.
- Click Create.
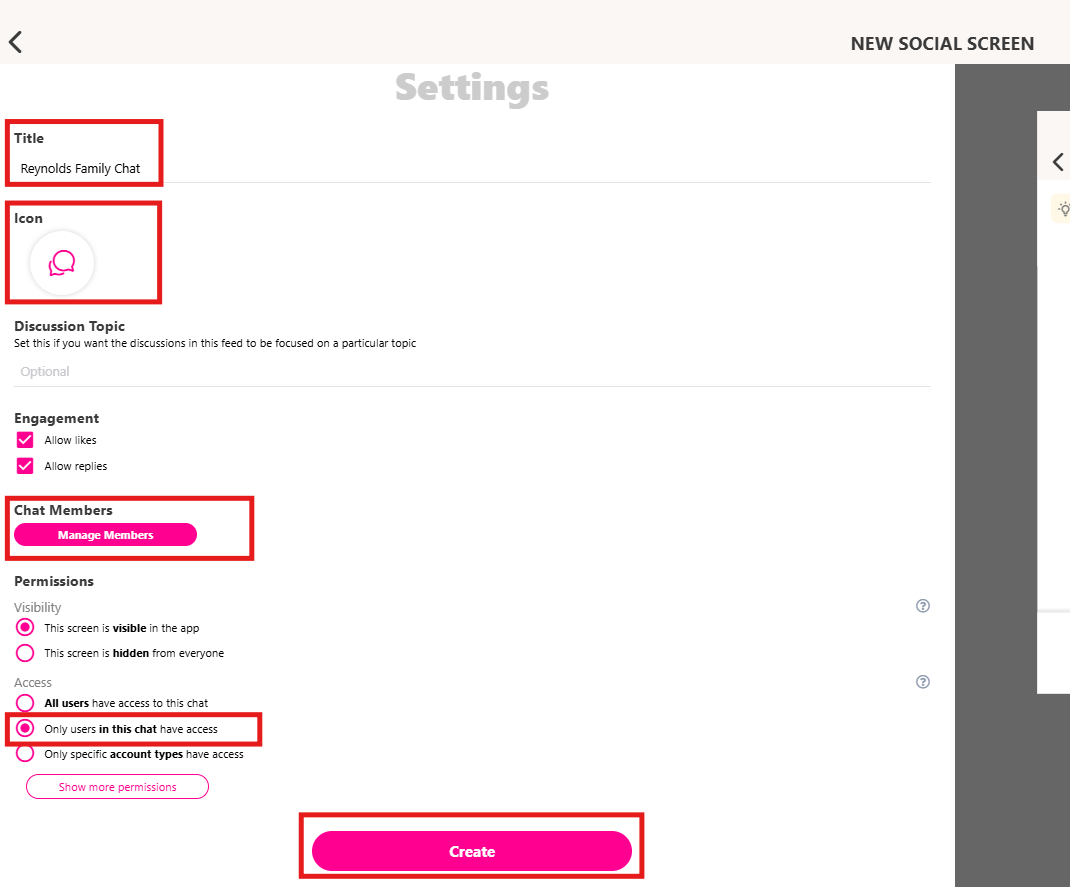
🔁 Repeat these steps for each family you want to set up.
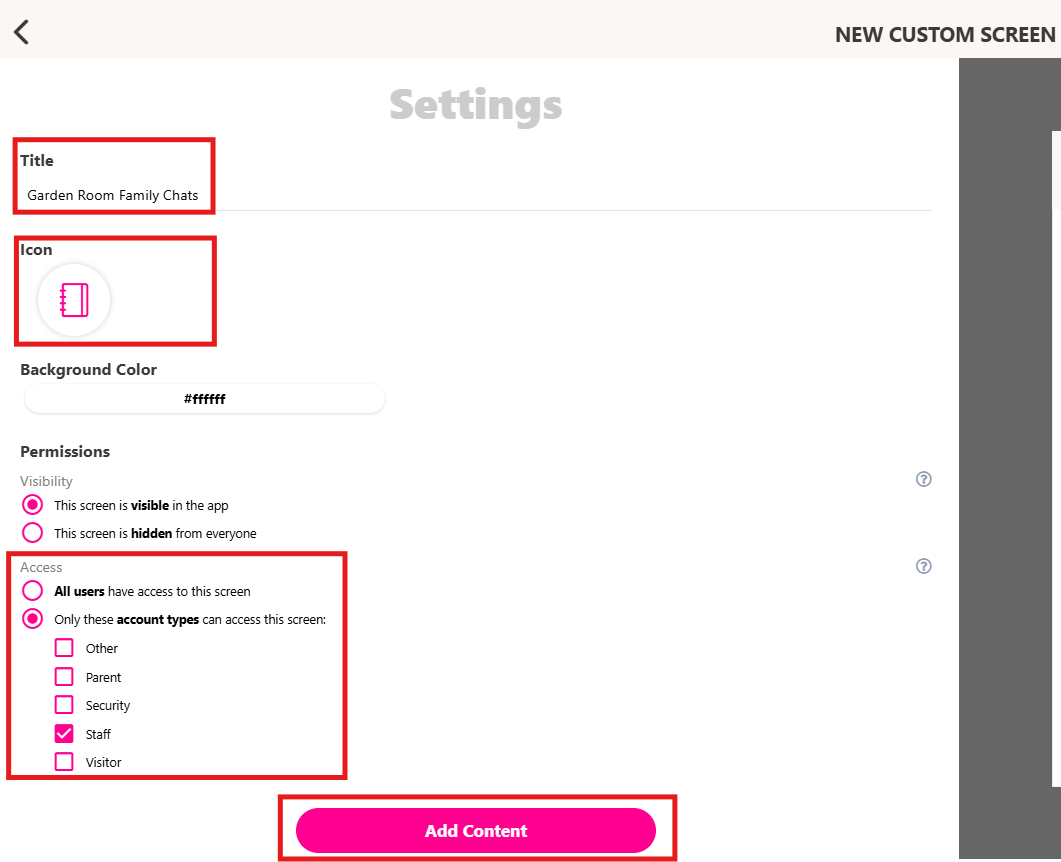
- Create a Classroom “Family Chats” Screen
- Click the ⚡ Lightning Bolt.
- Click Start from Scratch.
- Name it after the classroom (e.g., “Garden Room Family Chats”).
- Set your preferred icon and background color.
- Set Access to: Staff members only.
-
Click Add Content.
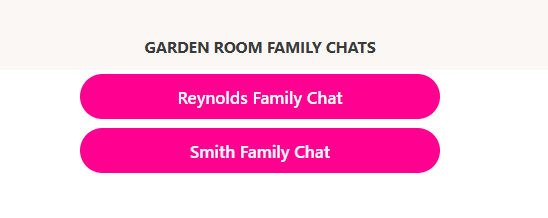
- Link each family chat you created (e.g., Reynolds, Smith, etc.).
- Click Plus icon → Button → To Screen → Navigate to Screen (Family Chat Screen) → Provide Title → Done.
- Once you’re done linking all family chat screens, click the Check mark at the top right of your screen.
- Click Create. You’re done! 🎉

💬You’ll now see all family chats organized in one place, making them easy to access and manage.
🎥 Video Tutorial
Check out the full Loom walkthrough at the bottom of this page.