
How to Bill Children Based on Their Transparent Classroom Form Responses (Enrollment Contracts & More)
You can filter who to bill based on children's most recent answers on a Transparent Classroom form — such as their enrollment contract, a field trip sign-up, or a hot lunch form. Set up tuition plans and program charges right from your app, without exporting Transparent Classroom data to a spreadsheet and manually cross-referencing families.
Note: This feature is available for schools connected to Transparent Classroom. For the broader "bulk select accounts" overview, see How to Bulk Select Accounts When Creating an Invoice.
Where to Find This
- Click the ⚡ Lightning Bolt (Admin Superpowers)
- Click Billing - payments, invoices, subscriptions
- Select Bill Someone
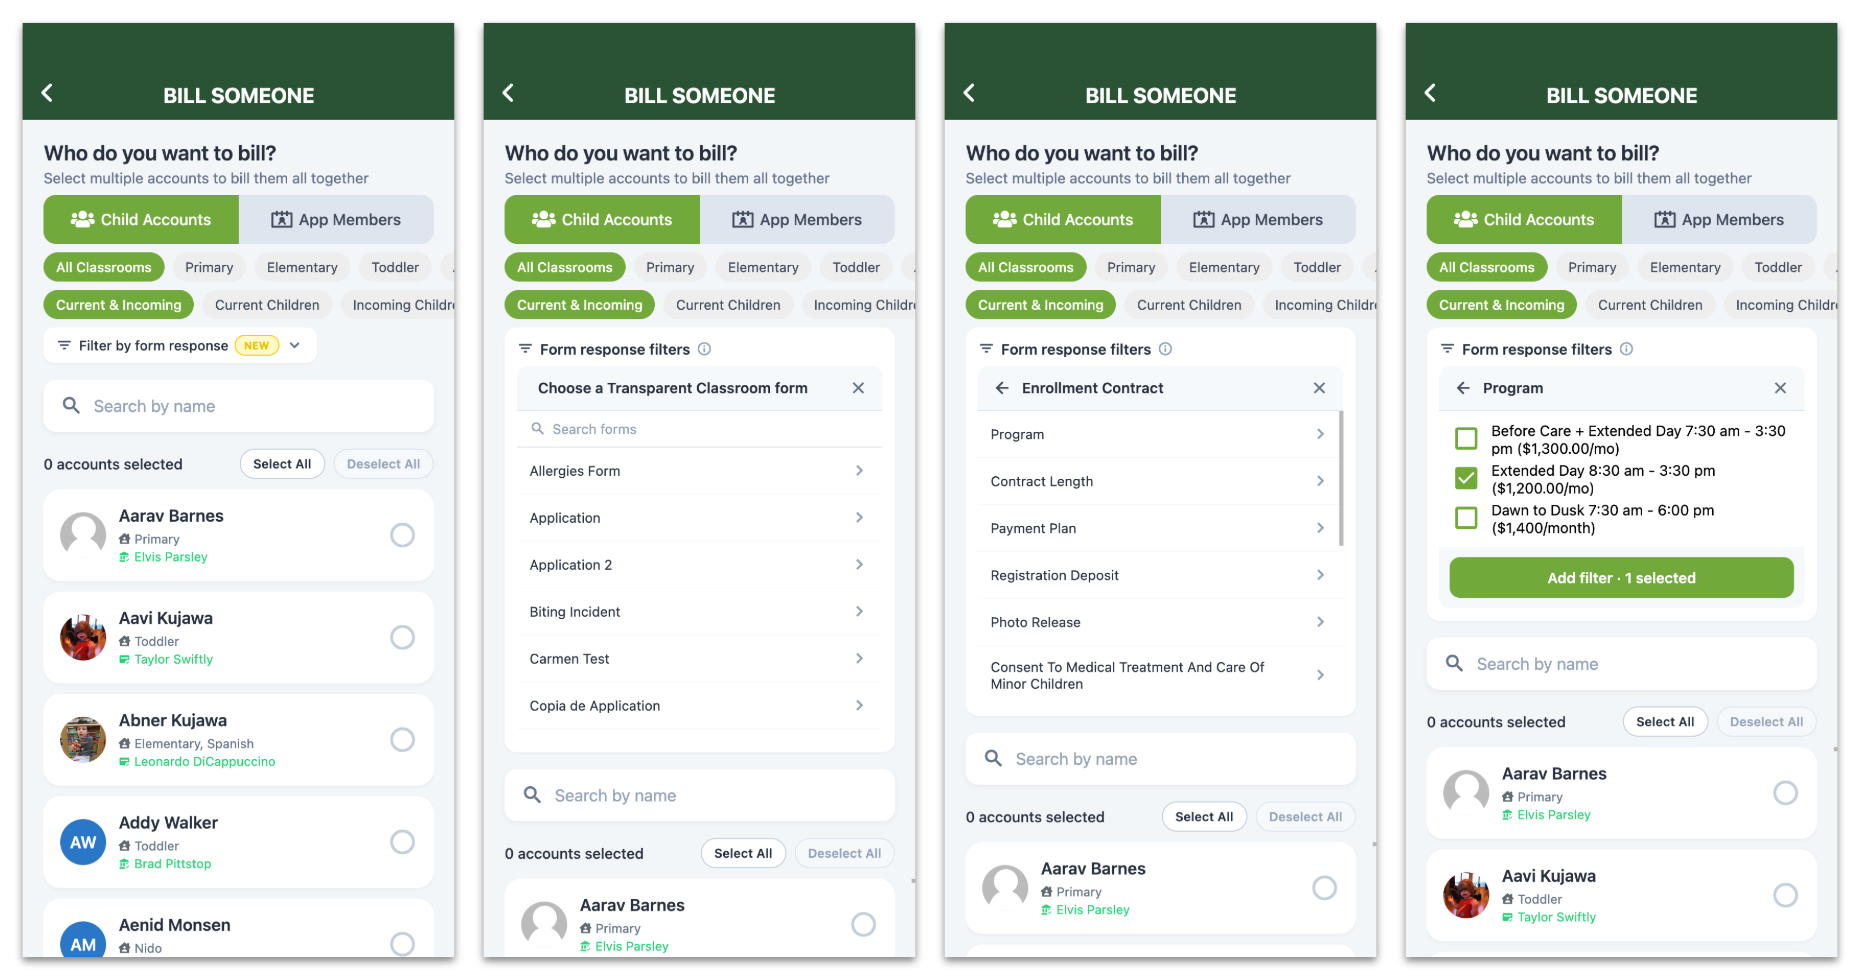
- Stay on the Child Accounts tab — look for the Form response filters card below the status filter
Step-by-Step Guide
Step 1: Add a form response filter
- Tap + Add form response filter.
Filters use each child's most recent non-blank answer. If a family resubmits a form with the question left blank, their last real answer still counts. Children who never answered simply don't match.
Step 2: Choose the form
- Pick the Transparent Classroom form you want to filter by — for example, 2026-27 Enrollment Contract.
Step 3: Choose the question
- Only questions with a fixed set of answers — dropdown, multiple choice, checkboxes, or yes/no — are available to filter by. Free-text and staff-only questions won't appear in the list.
Step 4: Check the answer(s) to match
- Check one or more answers — for example, Toddler Morning Program — then tap Add filter.
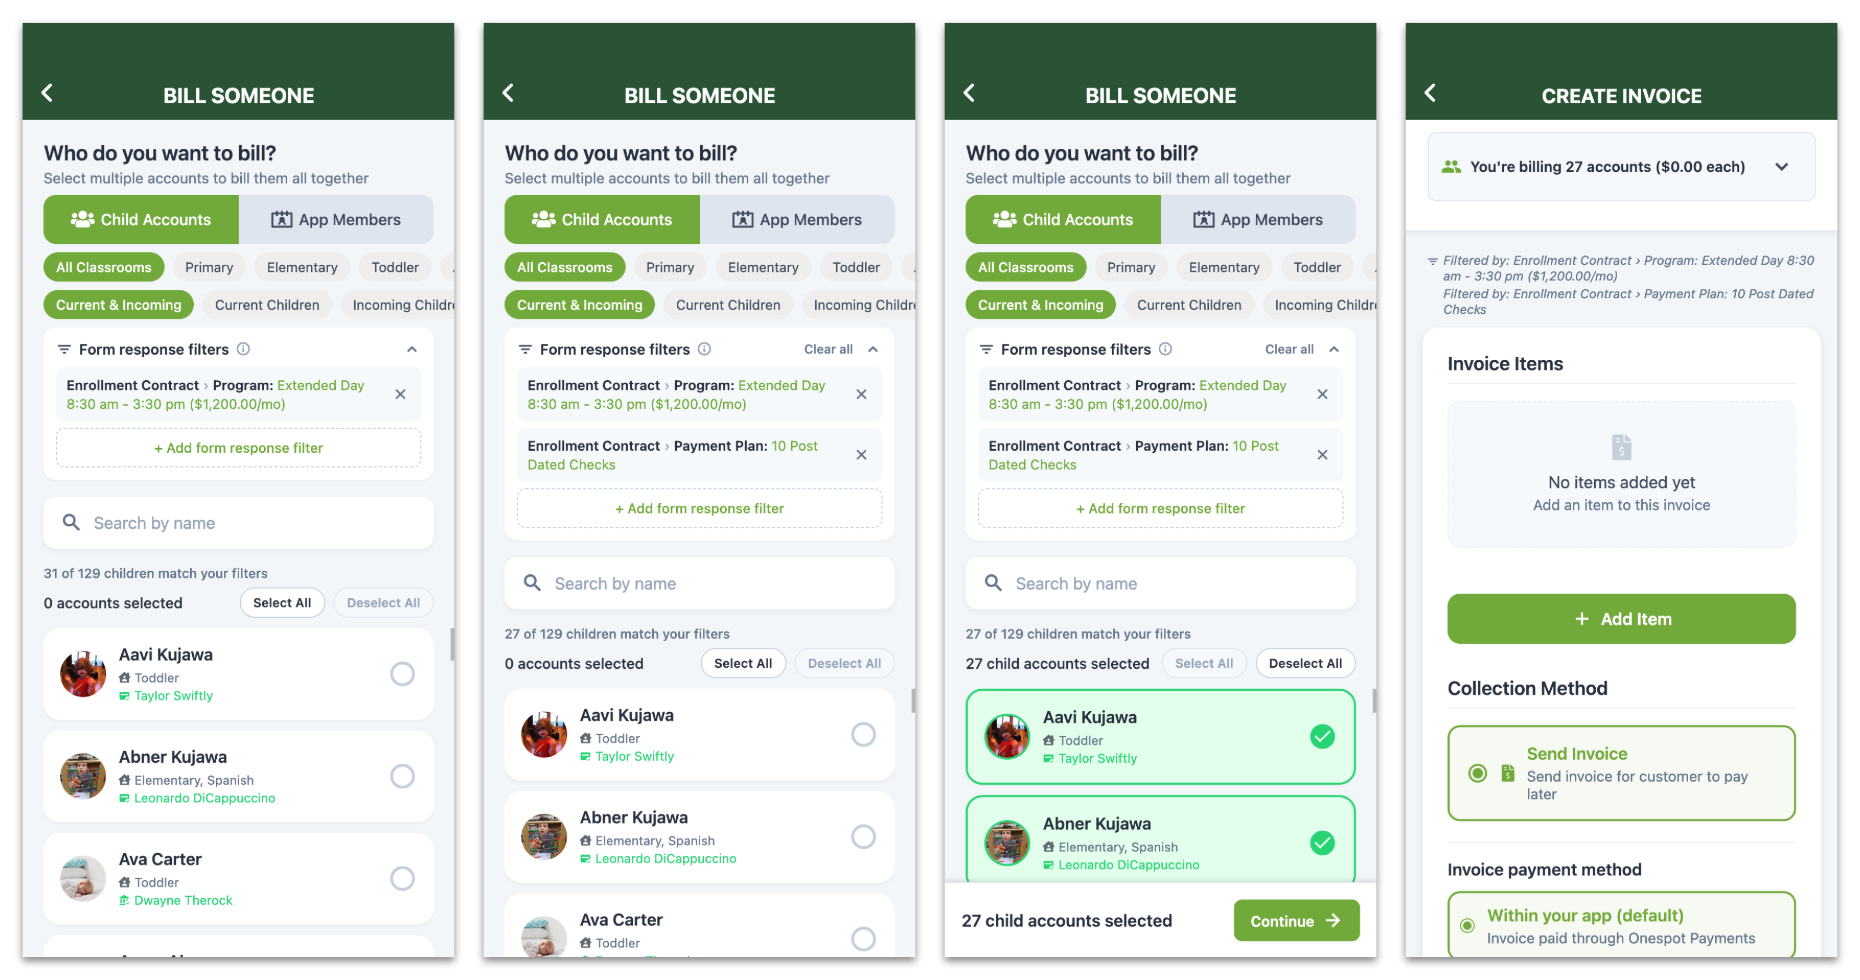
Step 5: Stack more filters (optional)
- Repeat Steps 1–4 to combine filters.
How multiple filters combine: A child must match every filter you add (AND), but within a single filter they only need to match one of the answers you checked (OR).
Example: Program = Toddler Morning and Hot Lunch = Yes → only families who match both. Adding "Half Day" and "Full Day" inside one Program filter → families in either one.
Step 6: Confirm the match count and select
- An "X of Y children match your filters" line appears under the search bar so you can confirm how many accounts are showing.
- Use Select All to select everyone in your current filtered view, or hand-pick individual children.
⚠️ Changing a filter does not unselect anyone. Your selected children stay selected even if you edit or remove a filter or switch tabs.
Select All only adds the children currently showing — it doesn't replace your selection. So a child you filtered out earlier can still be selected and get billed.
Before you continue, use Deselect All to clear the list and re-select, or scan your selection count to confirm it's exactly who you intend to bill.
Step 7: Continue and double-check
- Click Continue to set up the invoice. The Create Invoice screen shows a "Filtered by: ..." line for each filter you applied, so you can double-check exactly who you're about to bill before sending.
How Matching Works
- A child must match every filter you add, but only needs one of the checked answers within a single filter.
- Only each child's most recent form submission counts — an old or superseded answer won't match.
Good to Know
The children list defaults to Current & Incoming, so incoming families — the main audience for enrollment-based billing — are included automatically. You can switch the status filter to Current Children, Incoming Children, or Left School at any time.