How to Invoice Multiple Accounts at Once
Need to send the same invoice to multiple families at the same time?
Onespot allows admins to bulk invoice multiple accounts in just a few clicks — perfect for things like event tickets, field trips, supply fees, or other school-wide charges.
This guide walks you through the simple steps.
Step 1: Go to Onespot Payments
- Click the ⚡ Lightning Bolt (Admin Superpowers).
- Select Onespot Payments.
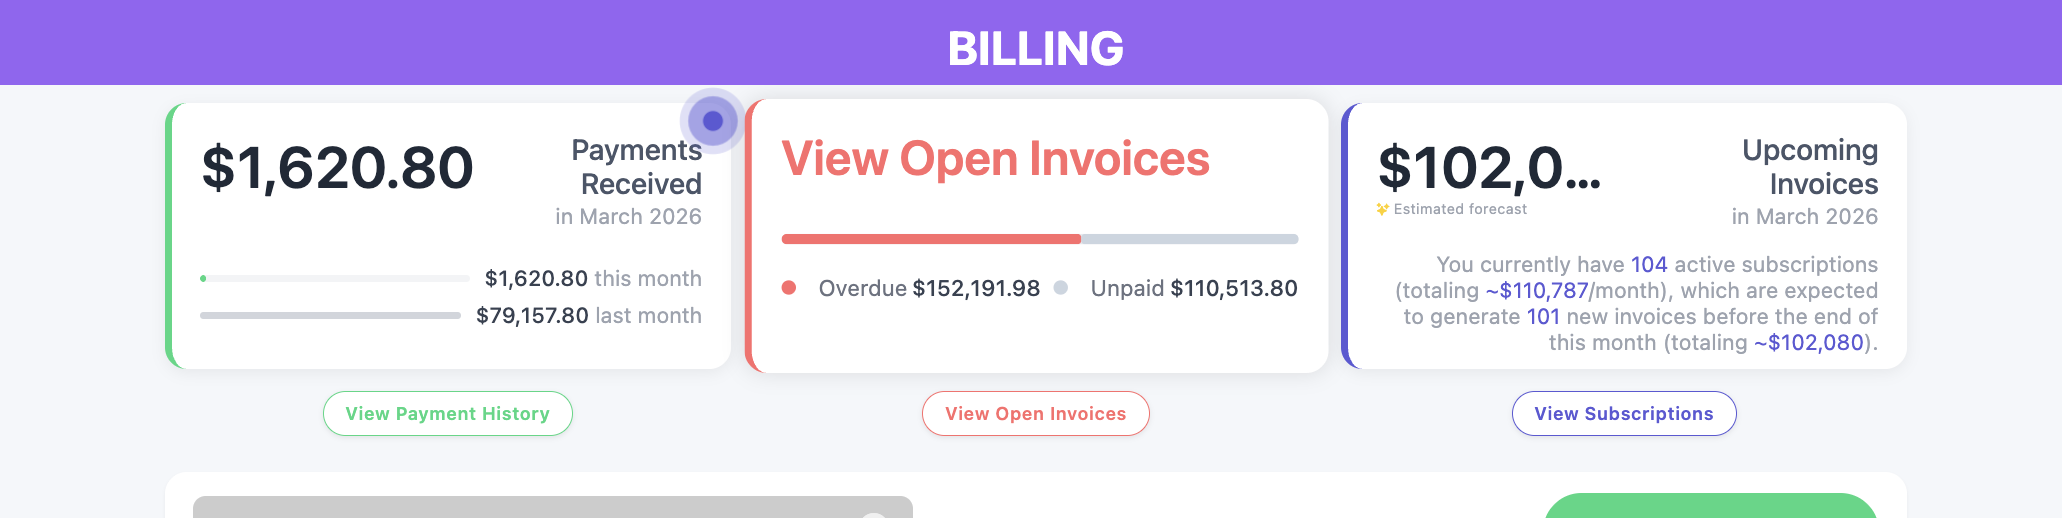
- Navigate to Billing - payments, invoices, subscriptions
This is where all invoices live.

Step 2: Click “Bill Someone”
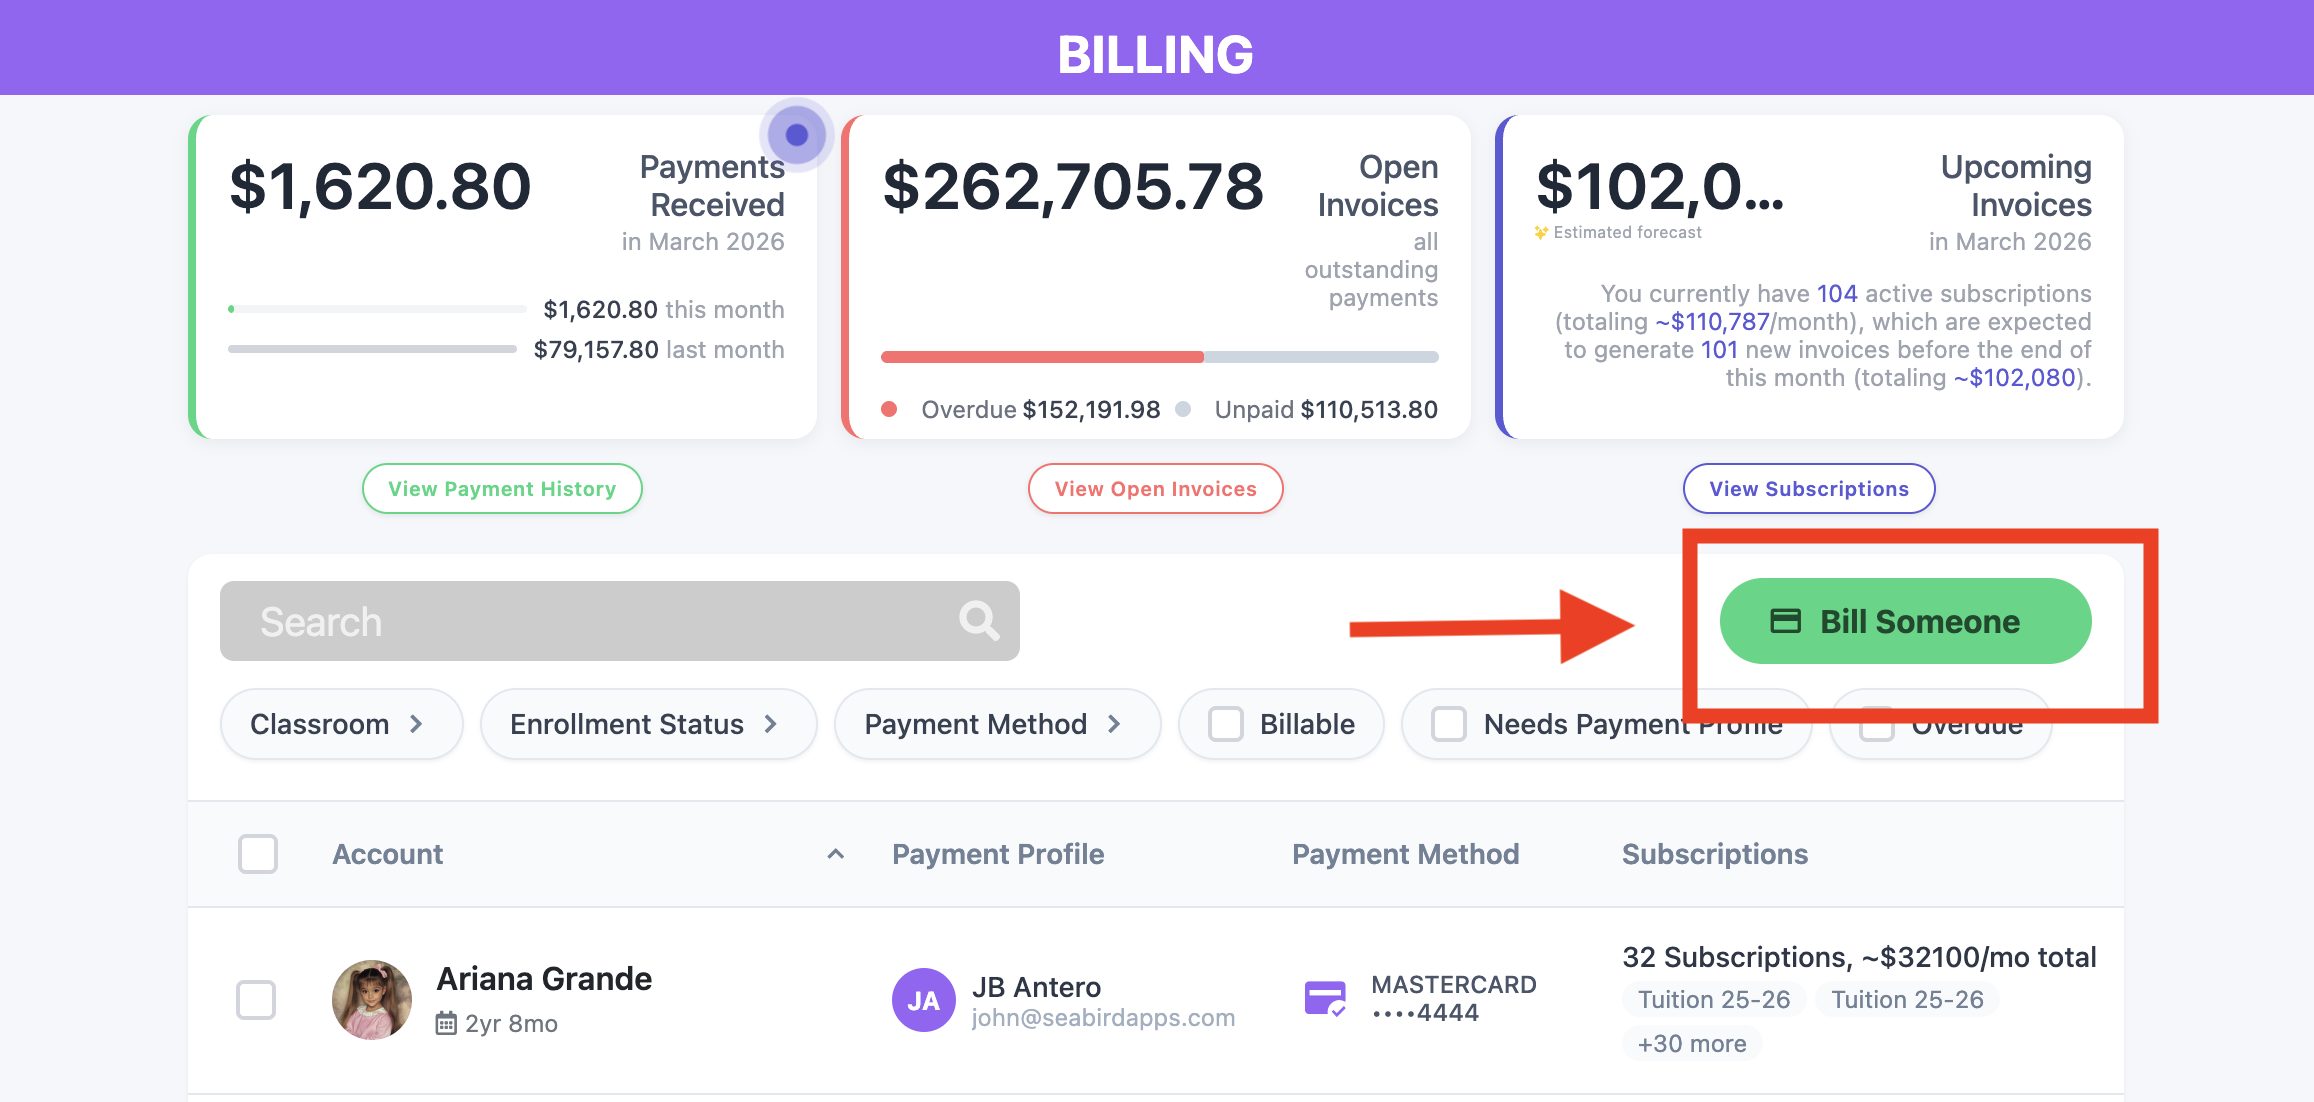
- On the right side of the screen, click the green button, "Bill Someone"
This is where you’ll choose who to invoice.
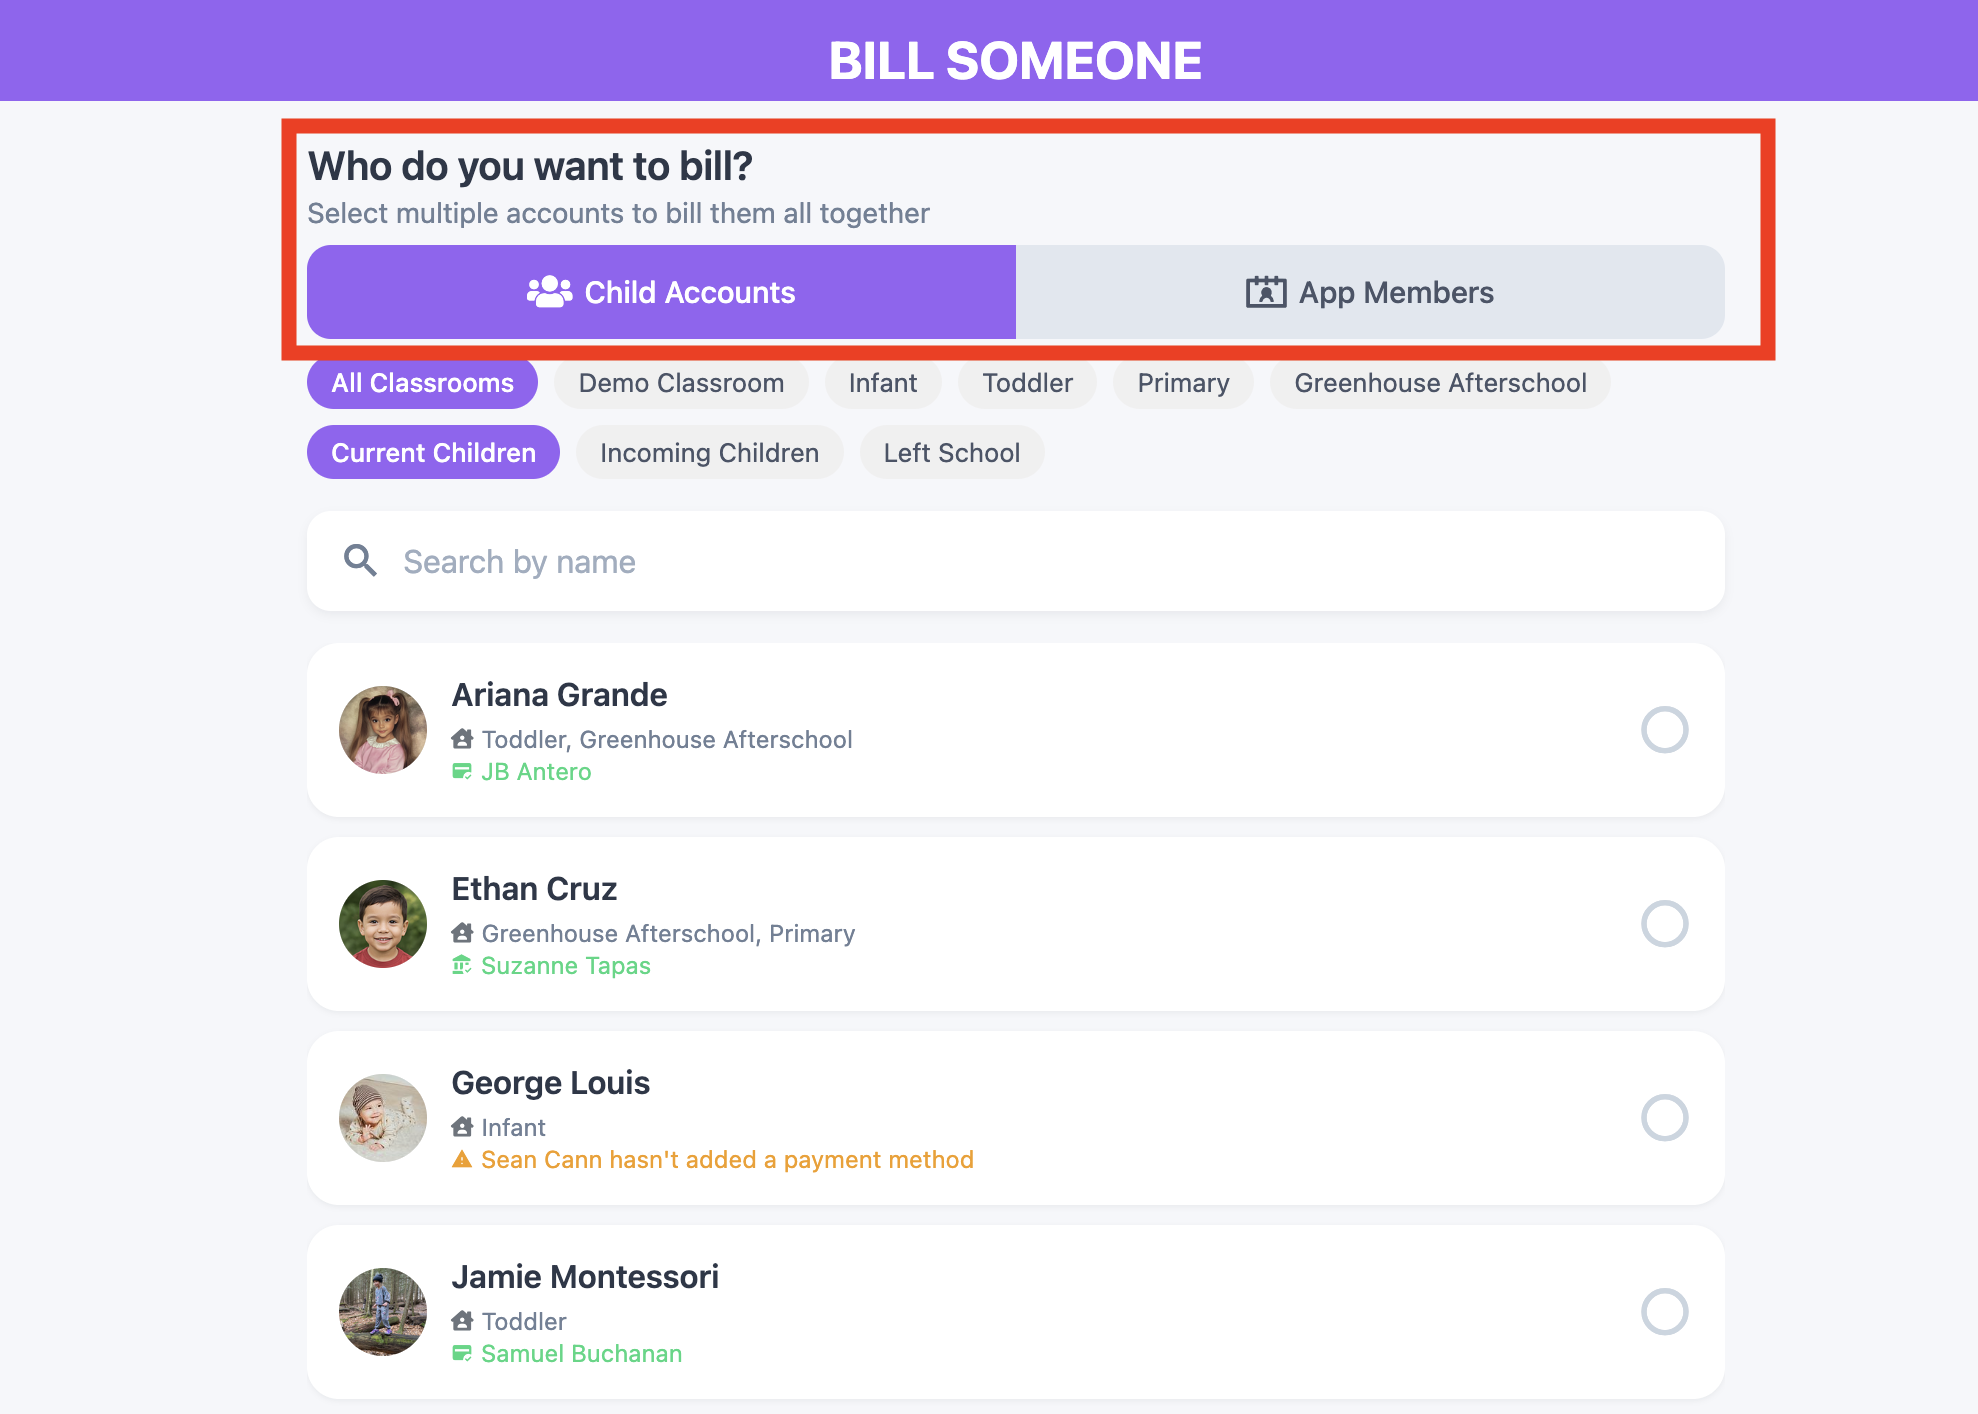
Step 3: Choose Who You Want to Bill
You will see two account types:
- Child Accounts
- App Members (Parents/Guardians)
Important: When to Choose Each
Use Child Accounts if:
- The child has an assigned payment profile
- You want the charge tied to the student
Use App Member Accounts if:
- The child does NOT have an assigned payment profile
- You want to invoice the parent directly
Step 4: Select Multiple Accounts
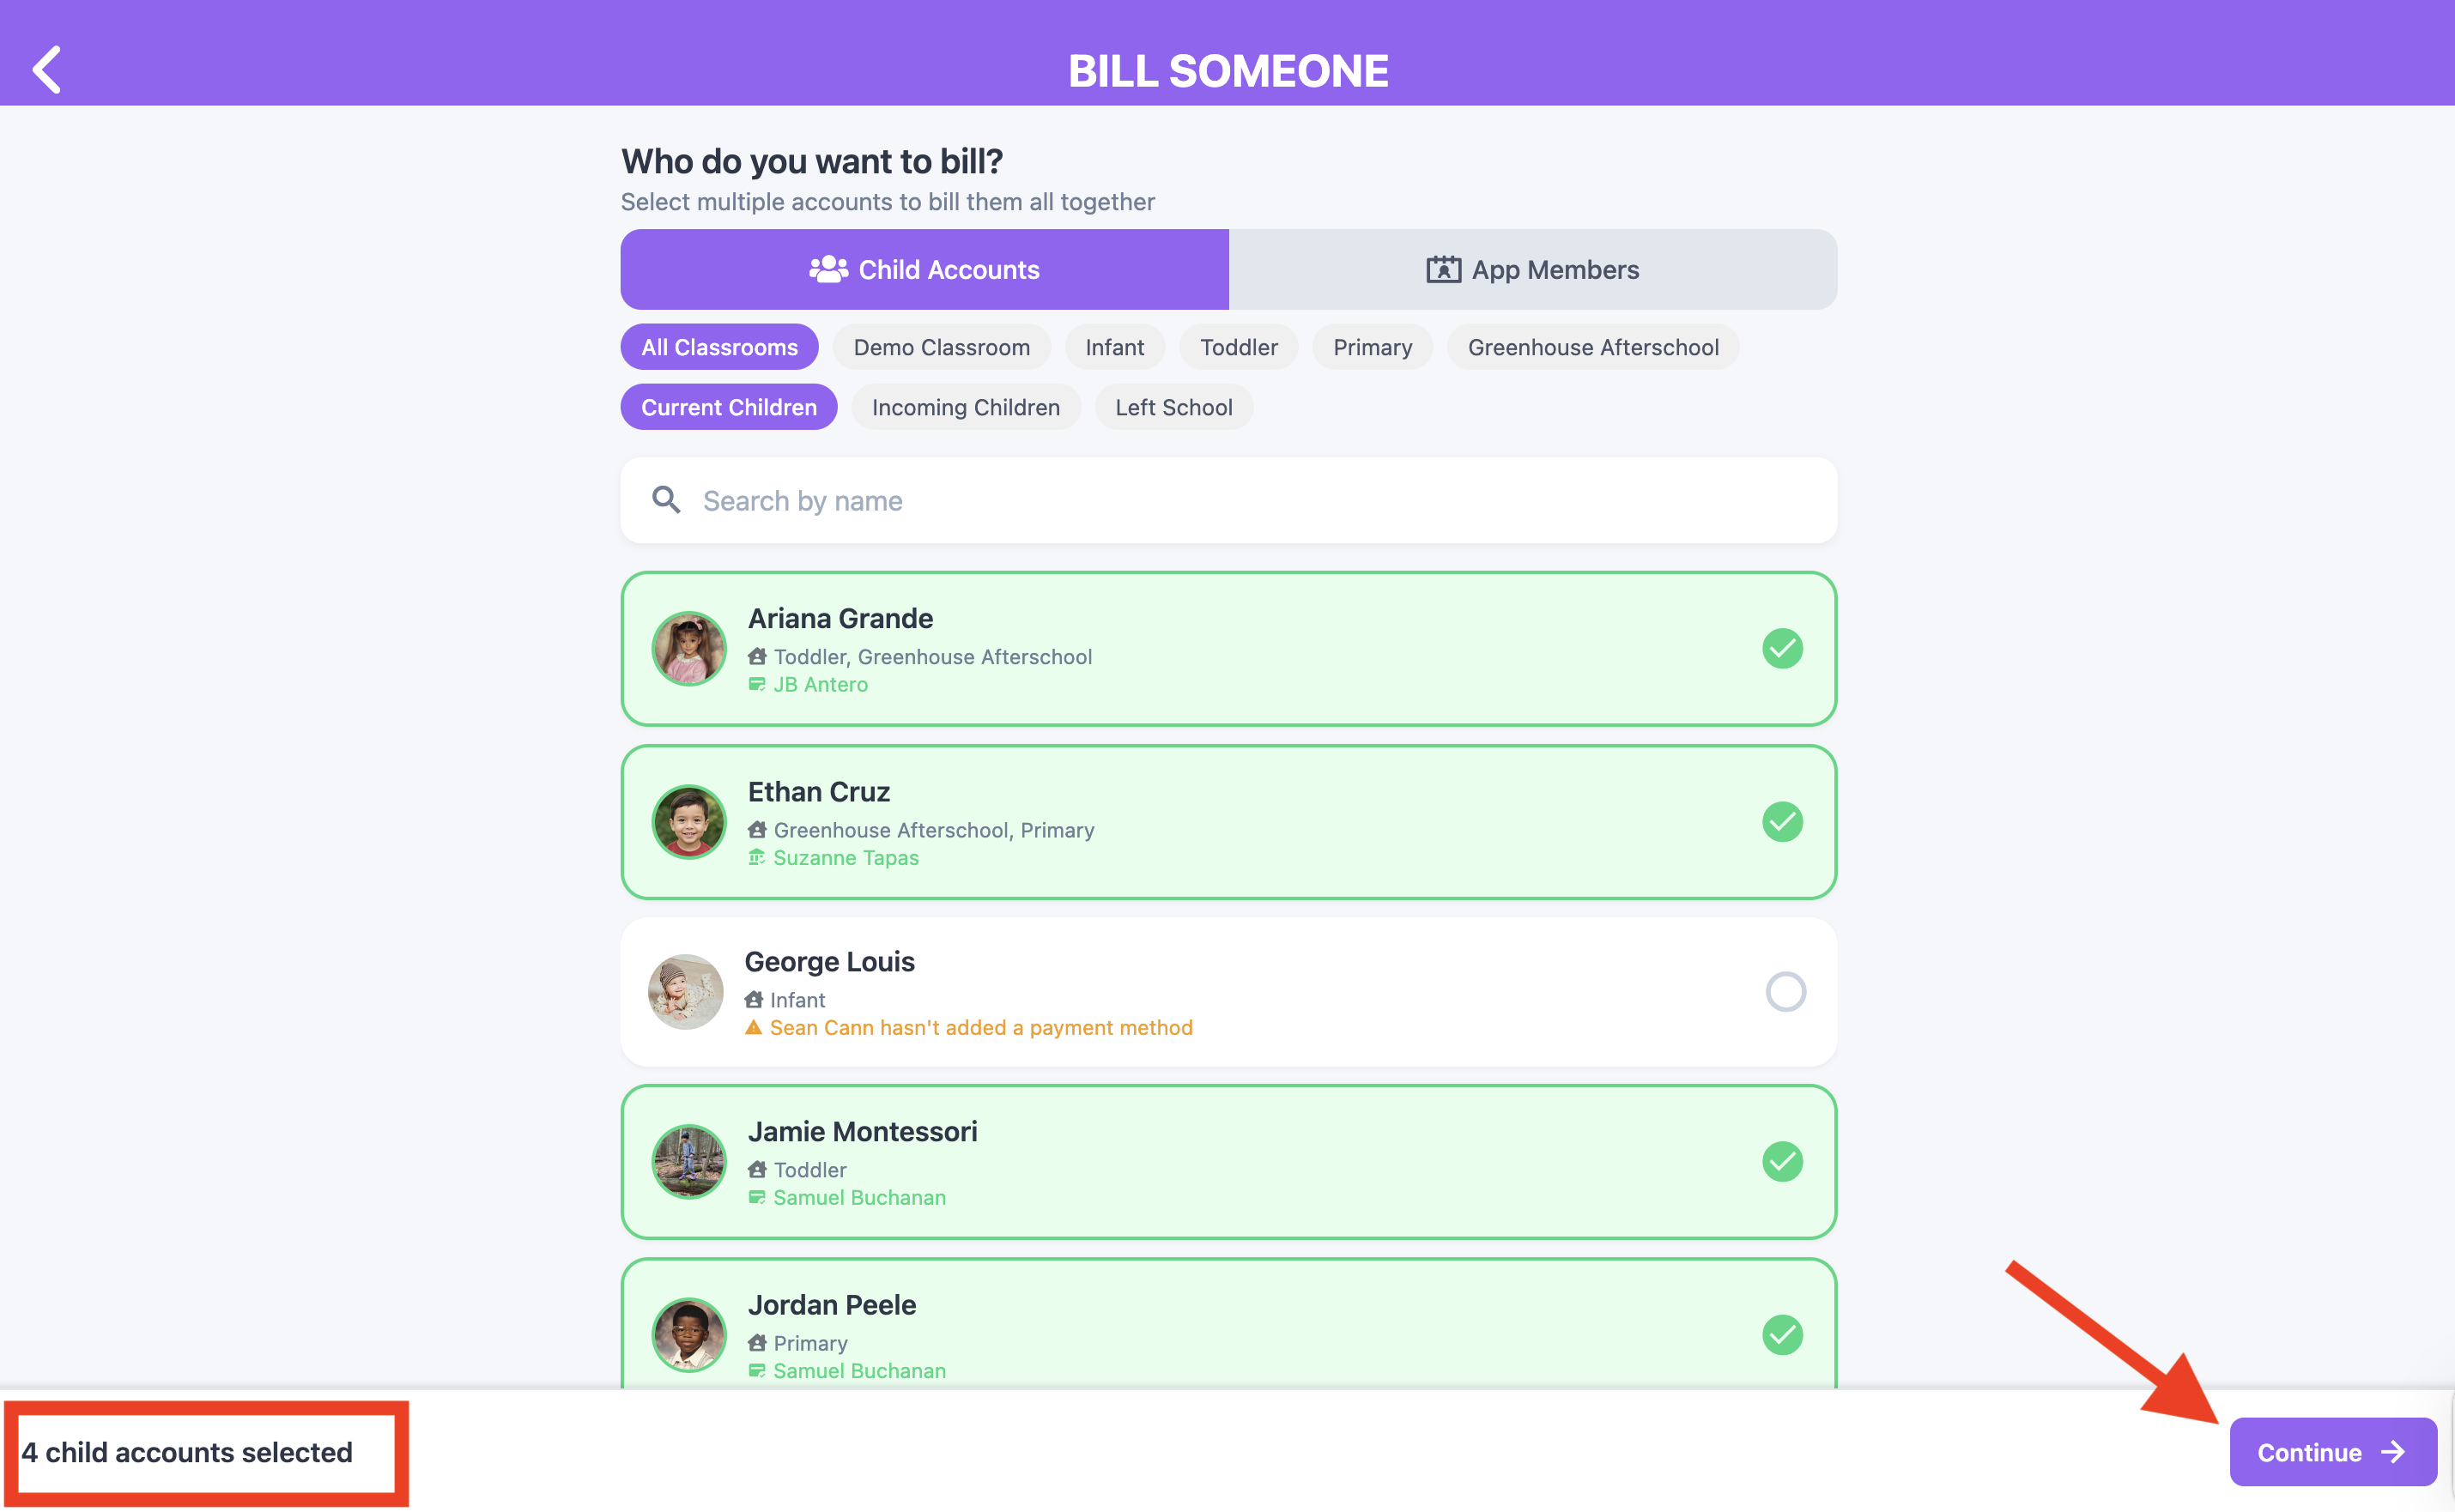
- Click the small circle next to each account.
- When it turns green with a checkmark, it means it’s selected.
- Select as many accounts as needed.
⚠️ Before You Continue
Bulk invoicing works best when:
- All selected accounts are receiving the same invoice item
- The invoice amount is the same for everyone
If certain students need:
- Different pricing
- Special discounts
- Custom adjustments
It’s recommended to invoice those accounts separately.
Step 5: Click Continue
- After selecting all accounts, click Continue
- You will now create the invoice.
Step 6: Create the Invoice
On the invoice creation page:
💡At the top, you’ll see a confirmation showing how many accounts you selected
- Under Invoice Items, click Add Item
- Choose the collection method: Charge Automatically or Send Invoice
- If sending an invoice for the customer(s) to pay later, choose invoice payment method: Within your App (default) or By cash/check
At the bottom, review the invoice summary.
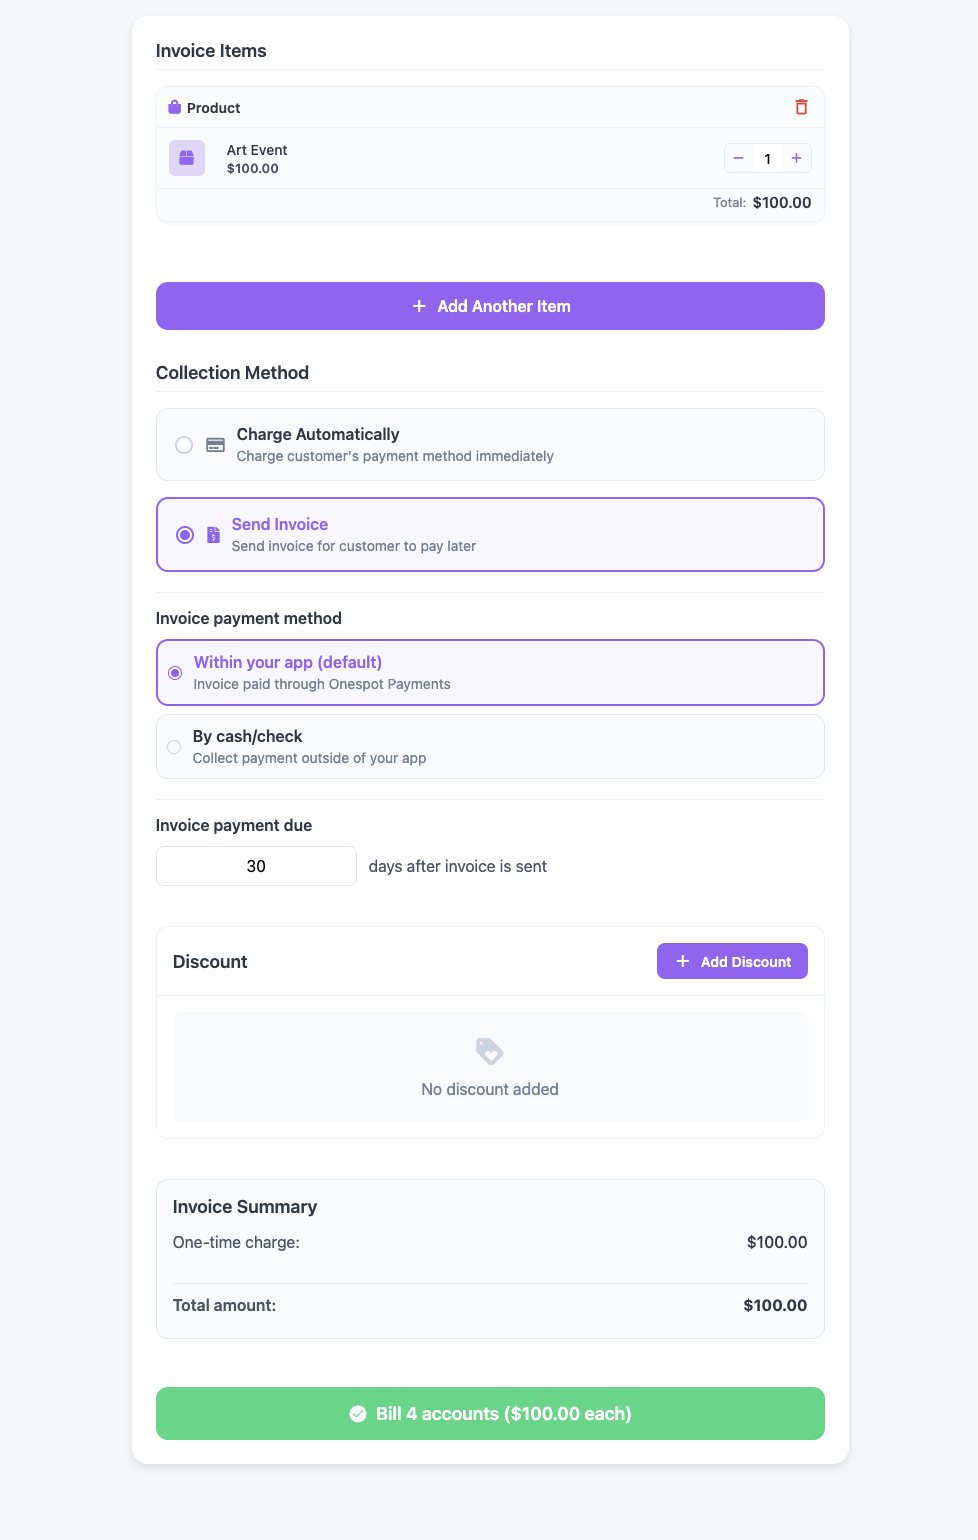
Step 7: Bill the Accounts
- Click: Bill [Number] Accounts
A confirmation pop-up will appear showing: Total number of accounts billed, Total amount, Per-account charge
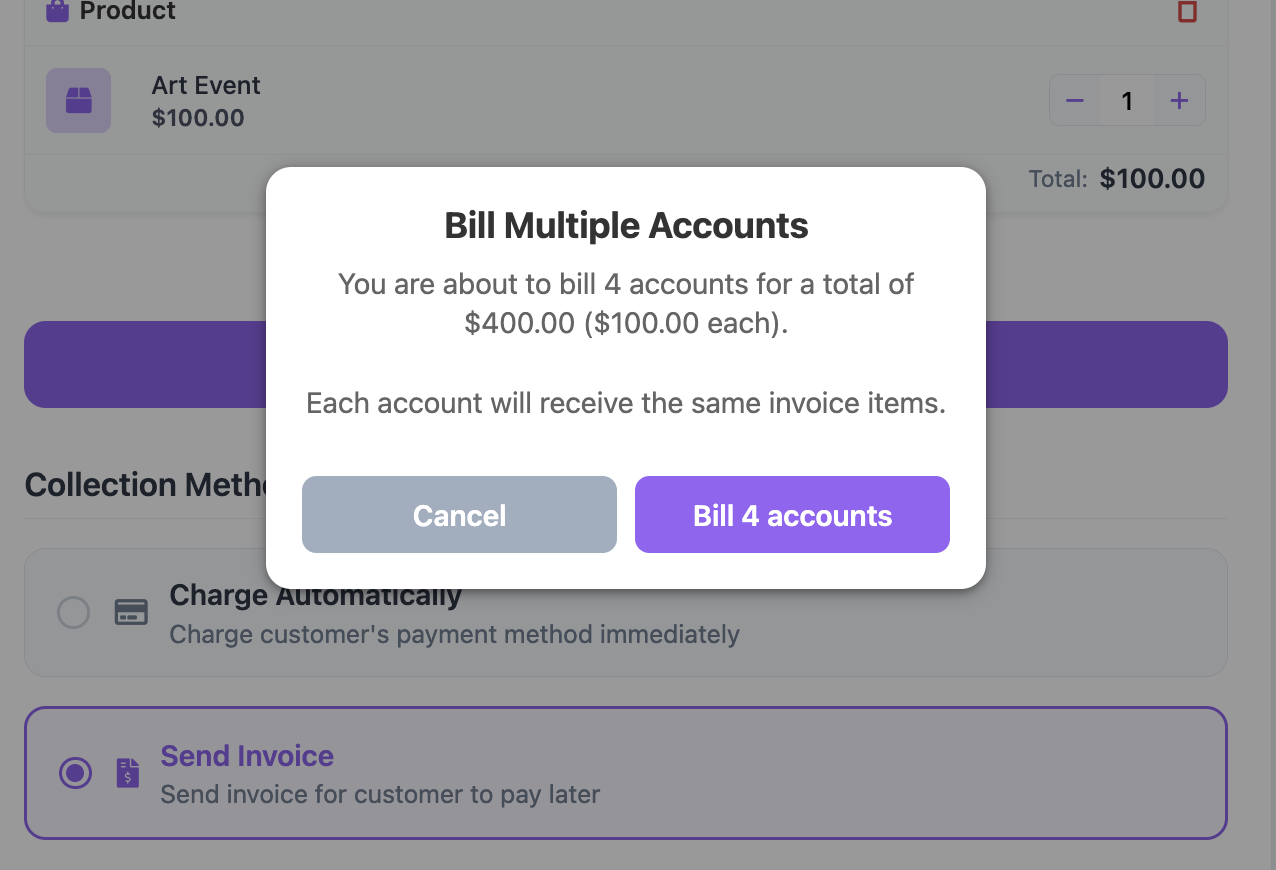
- If everything looks correct, click Bill
You’ll see a processing message while invoices are being created.
Step 8: Confirm the Invoices Were Sent
To verify:
- Go back to Invoices
- Click View Open Invoices
You should now see invoices sent to all selected accounts.