How to use SignUpJester
How to Use SignUpJester for Parent-Teacher Conferences & School Events
SignUpJester is a free scheduling tool created by Onespot that helps schools easily organize parent-teacher conferences, volunteer shifts, event RSVPs, and more. It works similarly to SignUpGenius — but is simpler, faster, and completely free. You can use it whether or not your school uses the Onespot app.
Below is a step-by-step guide showing you how to create an event, share it with families, and manage sign-ups.
Step 1 — Go to SignUpJester.com
Visit https://signupjester.com
You’ll see the SignUpJester home screen featuring the signature blue duck.
Click Get Started to create your account — or log in if you already have one.

Step 2 — Log In Using Your Email
Enter your email and click Quack to Get My Code.
SignUpJester will email you a login code for secure access.
Enter the code to continue to your Dashboard.

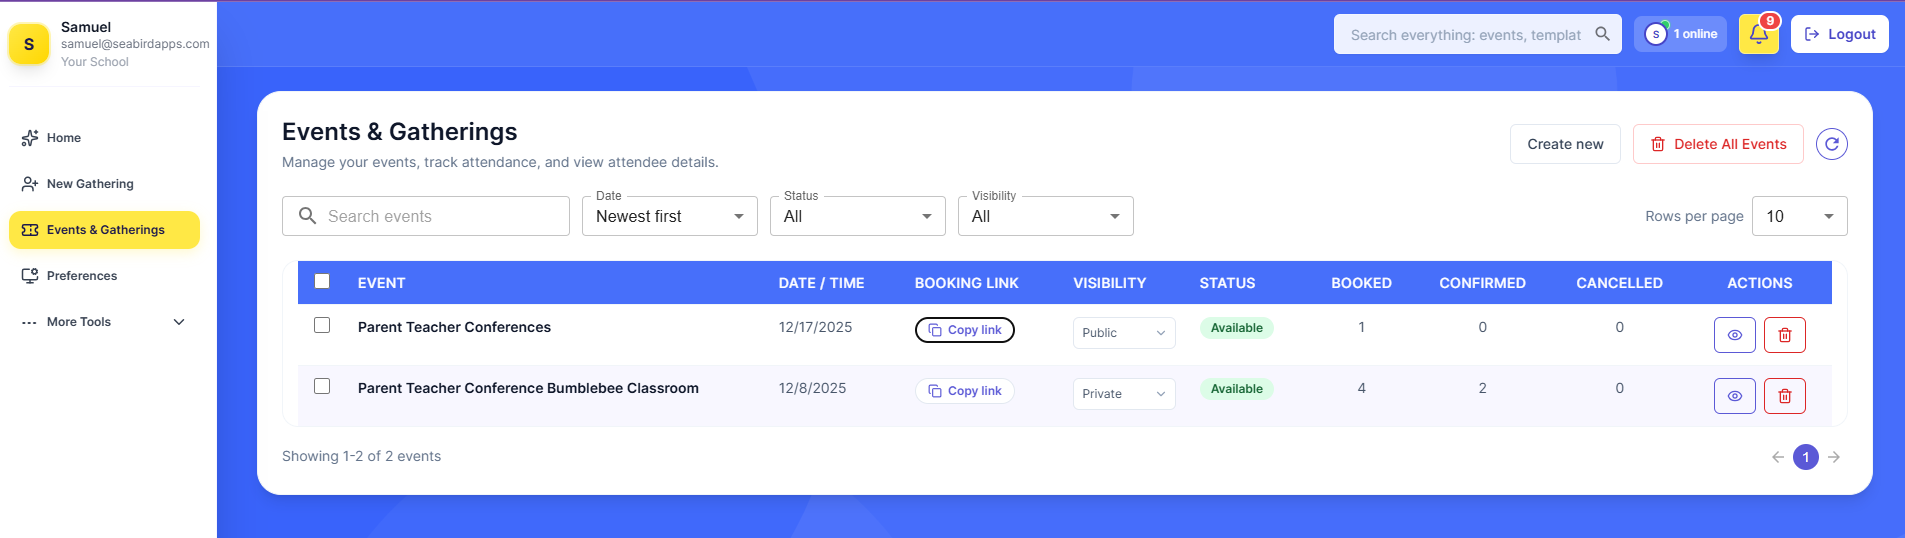
Step 3 — Explore Your Dashboard
In your dashboard, you’ll see:
- Active events
- Upcoming bookings
- Links to share
- Templates for common school events
- Preferences & profiles
To create a new event, click New Gathering.
You can:
- Generate an event with AI
- Use a template
- Create one manually
-

Step 4 — Create a New Event
Choose Create Manually.
Then fill out the event details:
Event Basics
- Title: e.g., Parent-Teacher Conferences – Bumblebee Classroom
- Description: Add quick context for families
- Theme: Choose from available designs
- Location: e.g., Bumblebee Classroom
A live preview will appear on the right.
Step 5 — Set Your Date, Time, and Slot Length
Choose your schedule:
- Date (e.g., December 17th)
- Slot length (e.g., 30-minute increments)
- Start time (e.g., 6:00 PM)
- End time (e.g., 10:00 PM)
- Max participants per slot (usually 1 for conferences)
Click Add Date to generate the schedule.
Step 6 — Add Custom Questions
You can collect information from families at sign-up.
Default fields:
- Parent name
- Parent email
Add custom questions such as:
- What would you like to discuss during your conference?
Mark questions as required if needed.
Step 7 — Set Visibility
Choose who can see your sign-up:
- Private link (recommended) — only people with the link can sign up
- Public
- Staff only
For most schools, a private link emailed to families works best.
Step 8 — Publish the Event
Click Publish.
Your event will now appear in your dashboard under Active Events.
Copy the link and share it with families via email, your Onespot app, or your website.
Step 9 — What Parents See
Families will see a list of available time slots.
After choosing a time and filling out the form:
- They receive a confirmation email
- Their slot becomes unavailable so no one can double-book
Parents will also receive an automatic reminder before the event.
Step 10 — View & Export Responses
As an admin:
- Go to your Dashboard
- Select the event
- View every booking and submitted answer
- Export as CSV for easy record-keeping
Why Use This Feature?
SignUpJester gives schools a clean, reliable, and free way to manage conferences and event sign-ups—without juggling spreadsheets or dealing with double bookings. It streamlines scheduling for both families and administrators, saves time, and makes communication easier.